
VIDEOS
Overview of the NOCO Boost Air AX65
More Videos
AX65
How To Jump Start.
Carefully read and understand the vehicle owner’s manual on specific precautions and recommended methods for jump starting the vehicle. The AX65 is for jump starting 12-volt lead-acid batteries only.
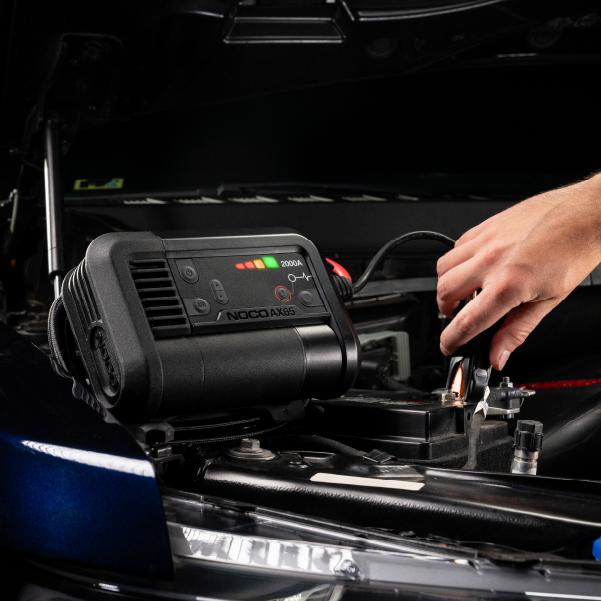
ATTACH CLAMPS.
Connect the battery clamps to the AX65 by connecting to the 12V OUT port. Then, connect the positive (red) battery clamp to the positive (POS,P,+) battery terminal and the negative (black) battery clamp to the negative (NEG,N,-) battery terminal or vehicle chassis.
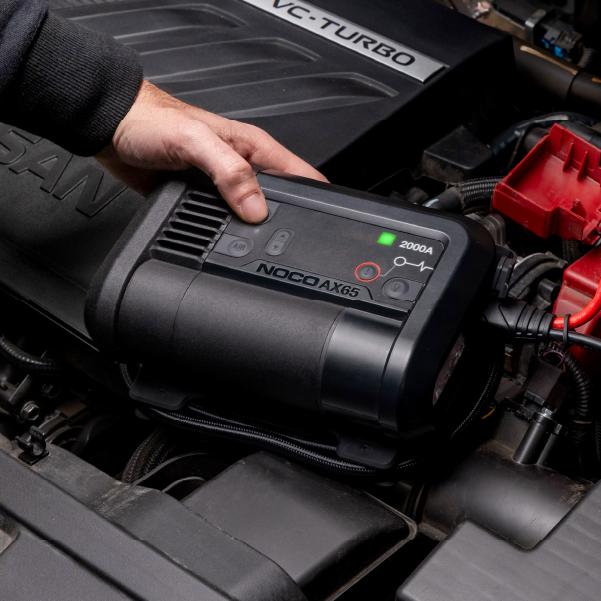
POWER ON.
Turn off vehicle’s power loads (headlights, radio, AC, etc.) before jump starting. Press the Power Button on AX65 to begin, and all LEDs will flash once. If properly connected to the battery, the white Boost LED will illuminate and battery charge LEDs will chase. 60-Second Timeout countdown will begin when battery is detected.
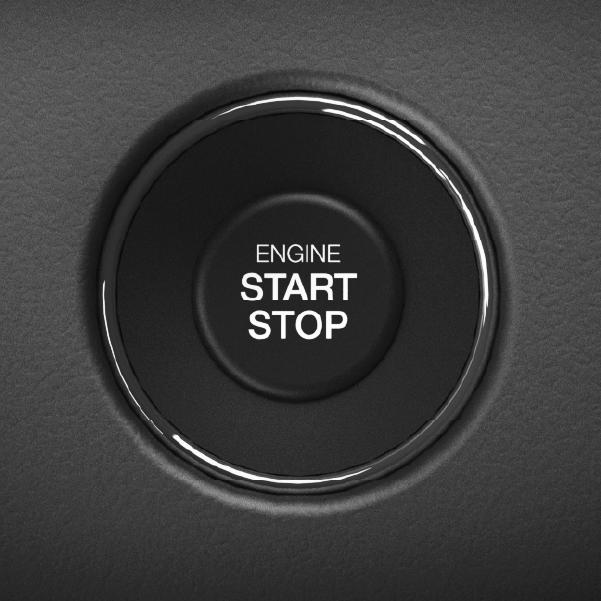
START VEHICLE.
Start vehicle. If vehicle does not start right away, wait 20-30 sec. and try again. After the 60-sec. timeout, the Product must be powered "OFF", then "ON", to initiate a new jump-start sequence. Do not attempt more than 5 consecutive jump starts within 15 min. period. Allow the AX65 to rest before attempting to jump start again.
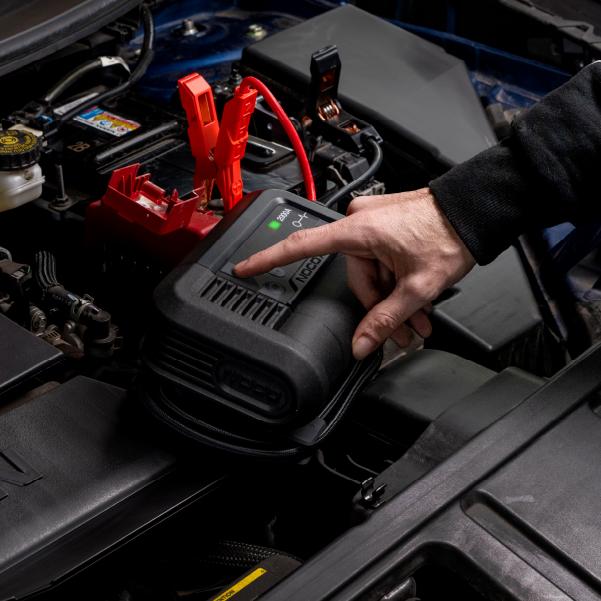
POWER OFF.
Once you have started your vehicle, power "OFF" the Product, disconnect the battery clamps, and remove the AX65.
AX65
How To Inflate.
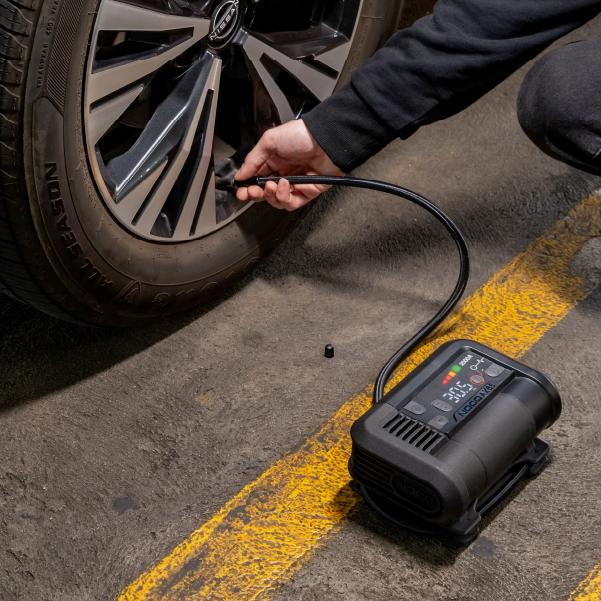
CONNECT THE AIR HOSE.
Connect the air hose on the AX65 to the tire before starting inflation. The air hose will screw onto the tire's air valve. No tools are necessary and should be hand tightened.

ENABLE AIR MODE.
Turn the Product "ON" by pressing the Power Button, if more than 3 PSI is detected, then the detected pressure will be displayed with the “SET” LED being "OFF". Press the Air Button to enable Air Mode. The Product will display the Set/Detected pressure.
SET PSI.
Change the Set Pressure to desired tire pressure level by pressing the ▼ or ▲ Buttons. Hold both ▼ and ▲ Buttons together at anytime to change the unit of pressure displayed (BAR, KPA, PSI).

INFLATE.
Press the Air Button again to begin tire inflation. During inflation the compressor may turn "ON" and "OFF" (Dynamic Dwell) as it gets closer to the desired set point. Inflation will continue until the Set Pressure has been reached.
AX65
LEDs


Reverse Polarity
Unit is connected to the battery in reverse. Reverse the connections.

Cold LED
Illuminates solid or flashes Blue when internal temperature is too low.

Hot LED
Illuminates solid or flashes Red when internal temperature is too high.

Error LED
Blinks “on” and “off” in various sequences (from 1 to 6 blinks) to convey error conditions.

Charge LEDs
Indicates the charge level of the internal battery.

Boost LED
Illuminates White when Boost is active. The LED flashes white when Manual Override feature is active.
AX65
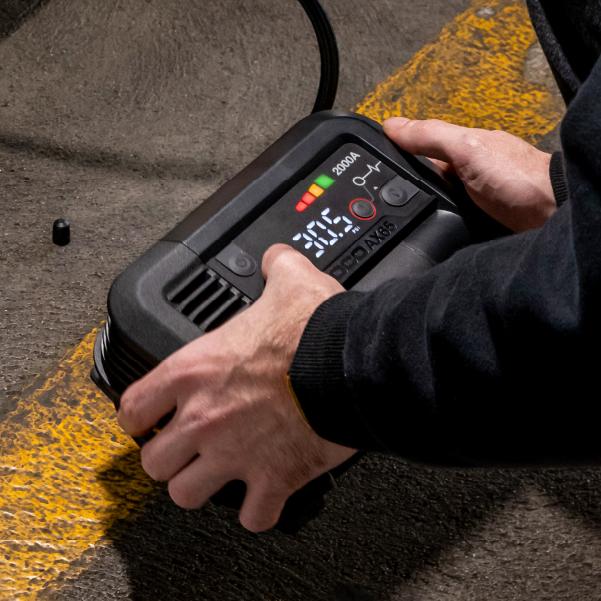
Intuitive Pressure Gauge.


Actual Pressure
When the “AIR” button is pressed, the compressor will begin inflating, the “SET” LED will turn off and the actual pressure will be displayed.

Set Pressure
When the display is in pressure set mode the “SET” LED will illuminate. Use the arrow buttons to set the desired pressure.

Change Units
To change units of pressure, hold both arrow buttons simultaneously for 3 seconds, use either arrow button to cycle through units.

Auto-Shutoff
Auto-shutoff works when pressure is above 15 PSI. Simply set the pressure and start inflating. AX65 will shut off when the desired pressure is reached.

Manual Air Mode
When pressure is below 15 PSI, use manual mode. Set pressure to 0.0 and press the "AIR" button. AX65 will run until the "AIR" button is pressed again.
AX65
Buttons


Power Button
Push to turn AX65 “ON” & “OFF” or restart Boost after 60-Second Timeout.
Arrow Buttons
Hold both Arrow Buttons to begin changing the pressure units. When LED Display is on, use the Arrow Buttons to change the set pressure.

Air Button
Push to initiate Air Mode to start inflating.

Manual Override
To enable, push and hold for three (3) seconds. WARNING: Disables safety protection and manually forces Boost "On". Only for use when a battery is too low to be detected.

Light Mode Button
Toggles the ultra-bright LED light through 6 light modes: 100% > 50% > 10% > SOS > Blink > Off.
Boost Air
TROUBLESHOOTING.
ERROR
REASON / SOLUTION
Product does not turn "ON"
Check battery voltage, charge Product.
Over-Temperature
Turn the Product "OFF" and place it in a well ventilated area, wait for Product to cool before powering "ON" again.
Under-Temperature
Turn the Product "OFF" and place it in an area within the recommended operating temperature, wait for Product to warm up before powering "ON" again.
Solid Red [ERR CLR]
Reverse polarity detected. / Reverse the battery connections.
Single (1) Flash: [ERR SRT]
Short circuit detected on battery clamps. / Remove all loads, reconnect clamps to battery.
Double (2) Flash: [ERR HIV]
High voltage detected at clamps (the AX65 is connected to a voltage system greater than 12V, such as 24V).
Quadruple (4) Flash: [ERR CRG]
Charge timeout error (i.e. the AX65 has been in bulk charge for too long).
Sextuple (6) Flash: [ERR BCC]
Back-Charge detected into the AX65 through the clamps while in Boost Mode (i.e. the AX65 is in Manual Override and then connected to a system greater than 12V, such as 24V).
Hot LED: Solid
Product is fully operational, but approaching upper temperature limit. / Allow the Product to cool.
Hot LED: Flashing [ERR HOT]
Product is too hot to jump start, only the flashlight is available in this state. / Allow the Product to cool.
Cold LED: Solid
Product is fully operational, but approaching lower temperature limit. / Allow the Product to warm up.
Cold LED: Flashing [ERR CLD]
Product is too cold to jump start, only the flashlight is available in this state / Allow the Product to warm up.

AX65
MANUAL OVERRIDE
PUSH AND HOLD FOR 3 SECONDS.
WARNING: Disables safety protection and manually forces Boost Air “On”. Only for use when a battery voltage is too low to be detected.
AX65
1 Year warranty.
All NOCO Boost Air units come with a limited 1 Year warranty. Register your product after purchasing to qualify for the applicable warranty.
Connect and Charge.
COMPATIBLE ACCESSORIES.
The following accessories are compatible with AX65.


Cookies On This Site
Our website uses cookies, pixels, and similar technology (“Cookies”) to make the website work and to improve your online experience. Cookies that are essential for the functioning of our website are always active and cannot be turned off. With your consent, however, we may also use non-essential Cookies to improve user experience, personalize advertisements, and analyze website traffic. By clicking “Accept All,” you consent to our use of all Cookies, including these non-essential Cookies. You may block non-essential Cookies by clicking “Reject,” or change your cookie settings by clicking “Preferences.”
By using our website, you acknowledge this notice, and by clicking “Accept All,” “Reject,” or “Preferences,” you agree to our Website Terms of Use. See our Cookie Policy and Privacy Policy to learn more.