Paintless Dent Repair Guide May 24, 2017
What PDR is and why it works:
What Is Paintless Dent Removal?
Paintless dent repair (PDR) is the process of removing dents from the body of an automobile. The most practical uses of PDR are for hail damage, door dings, minor creases, large dents and bodyline damage. An experienced PDR technician will use precise tapping with specialized tools to “massage out” dents from the inside of a car's body. Success rates depend on the professional’s experience, the location of the dent, size of the dent, extent to which the metal has been stretched, and flexibility of the manufacturer’s paint job. This being said, PDR is a much faster method of repair than repainting, which involves hours of sanding, filling, and painting by a professional. A PDR technician can complete the average job in 1-3 hours, often traveling to you to complete the service. For most people with minor dents, leaving their vehicle at a traditional body shop for 4-6 days just simply isn’t realistic. Dent removal is also significantly cheaper than a conventional body repair, often by 60%.
How Difficult Is It To Perform PDR?
Just like any skill, PDR takes a significant amount of time to master. NOCO always recommends you see a professional in order to be fully satisfied with a repair. However, it is possible to remove dents yourself at home, granted you have the correct tools. Properly removing dents involves getting the special metal rods and body picks to push out dents from the underside of the body panel. This is easier said than done, as you simply cannot place your hand behind the panel you need to work with. There are liners and multiple panels that will may need to be removed to get to the working surface. On top of this, PDR is very much a technique of “fine tuning,” meaning that it is easy to push too hard and make the dent worse and/or cracking the paint.
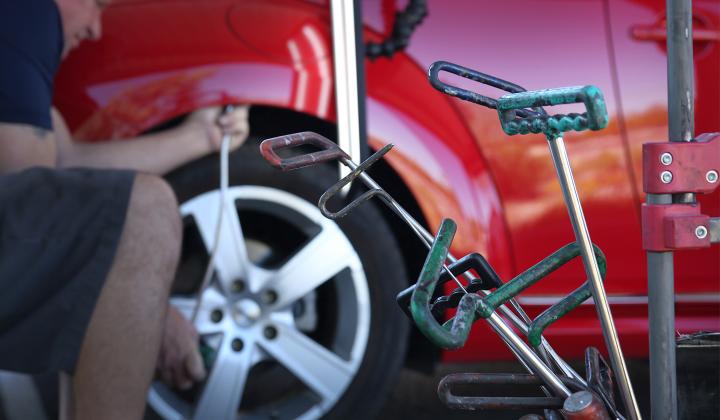
What Tools Are Used For PDR?
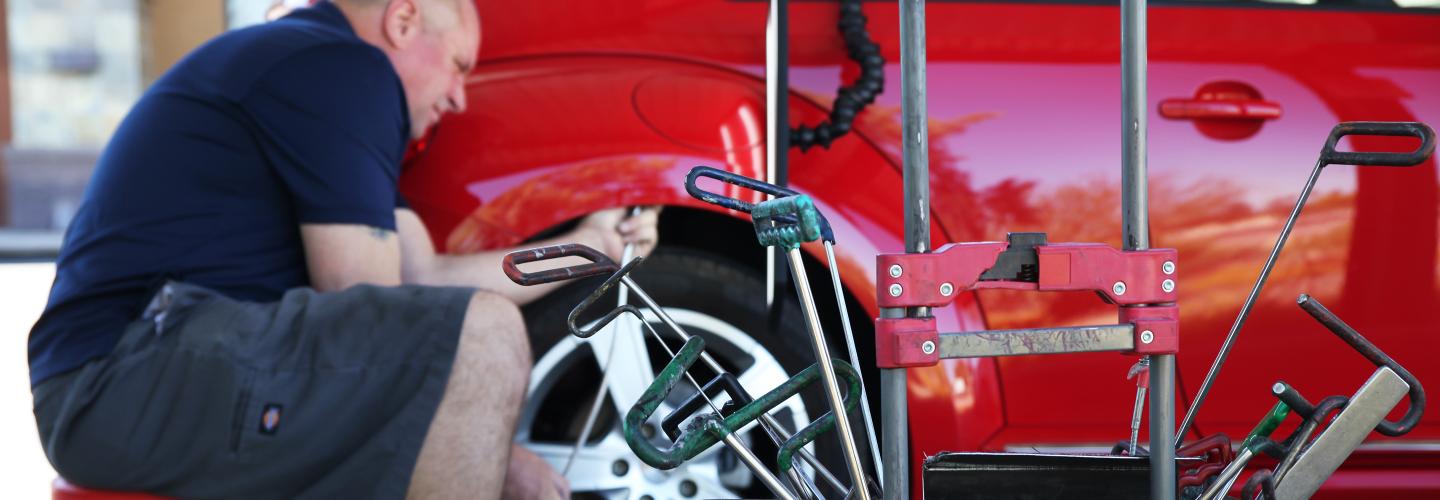
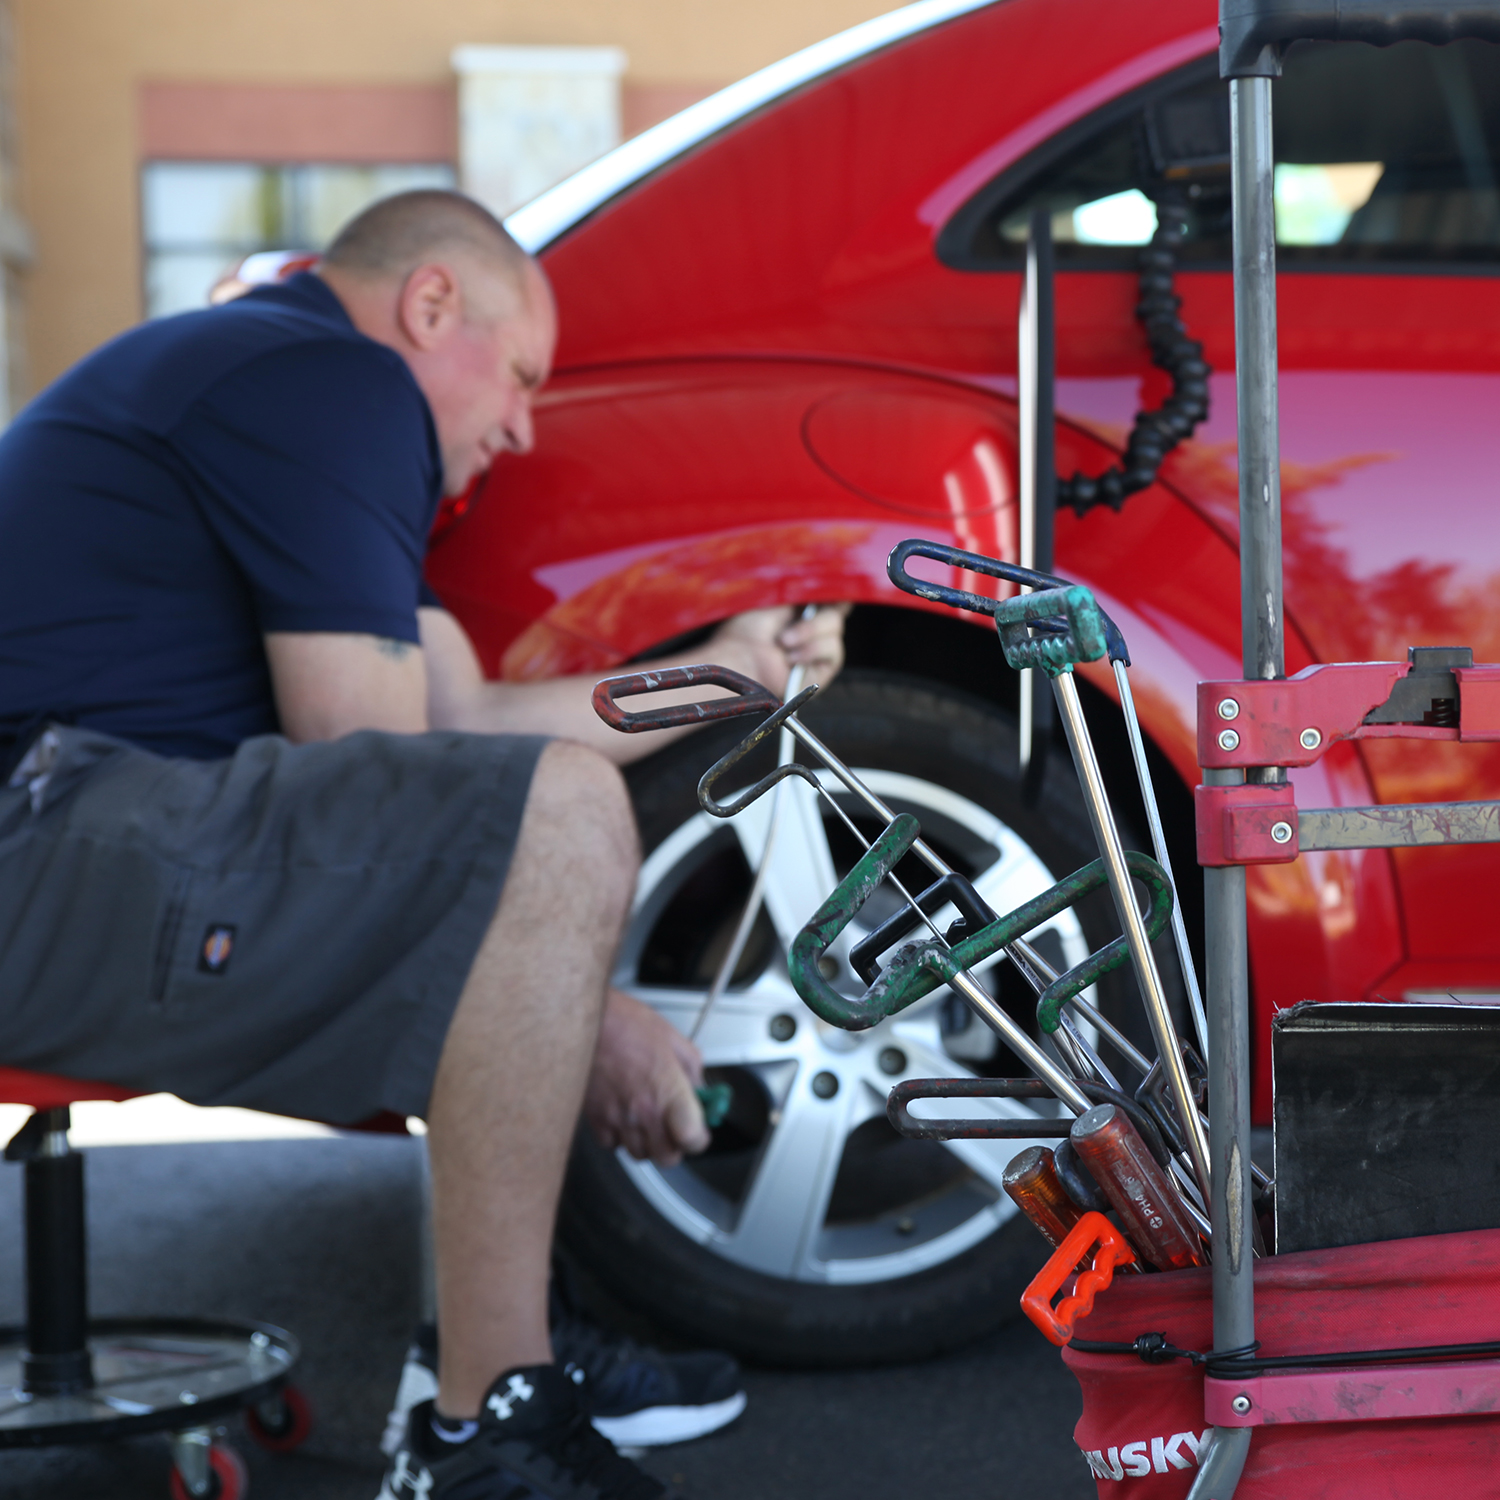
PDR technicians require a large arsenal of tools to successfully complete a job. “Pro” kits include various shape and length rods, wire tools, door hooks, window tools, black beauties, whale tails, flat bars and tweakers. Additionally, it is common to see technicians use light readers for accurate dent readings, LED lamps, and glue pulling kits. Every job requires multiple tools, and it is not the same for each individual case. However, the most common tool is the long metal rods used to gently push the metal back into place. These tools can be expensive, and the average car drivers are much better off paying for the service than buying their own set.
Performing PDR
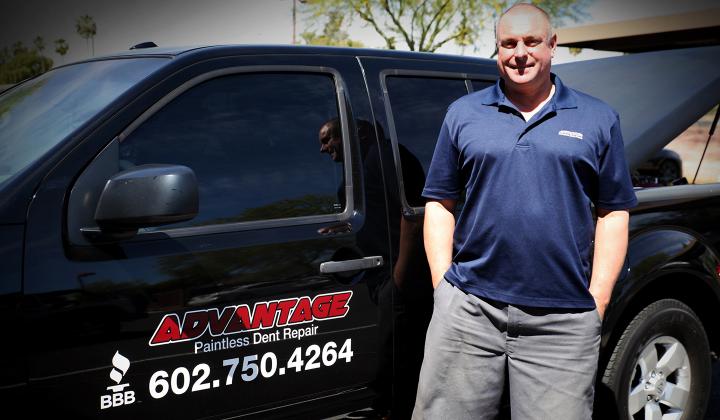
Now that we have a basic understanding of what PDR is, it is time to learn from a professional. Tony from Advantage Paintless Dent Repair in Chandler, AZ was kind enough to teach us what he does best!
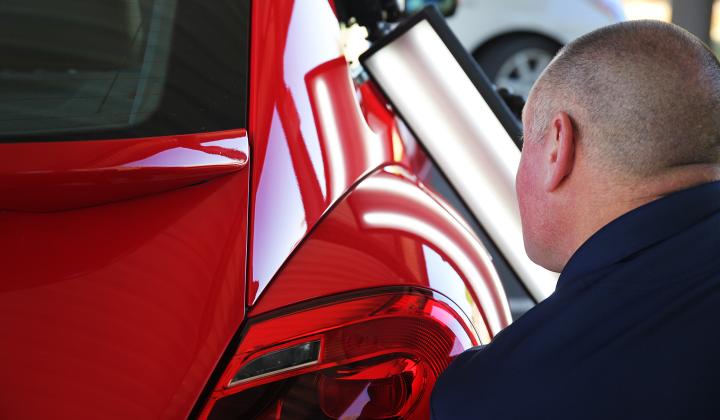
Step 1: Analyzing The Dent
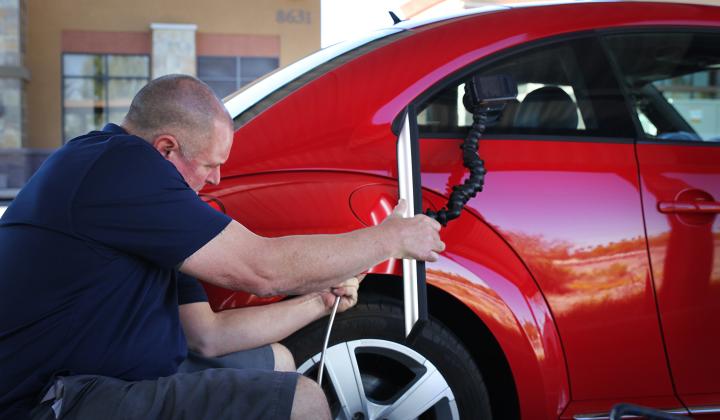
First and foremost, the dents must be identified and analyzed before making the repair. The PDR Technician will examine each dent, and how he or she will be able to reach behind the sheet metal. Once the Tech has an understanding of how the repair is done, he or she will choose an area to get started on. The Tech uses a suction-mounted LED to help see the intricacies of the dent, even in the day time. In order to better see the dent, technicians prefer to work in an area which is out of direct sunlight.
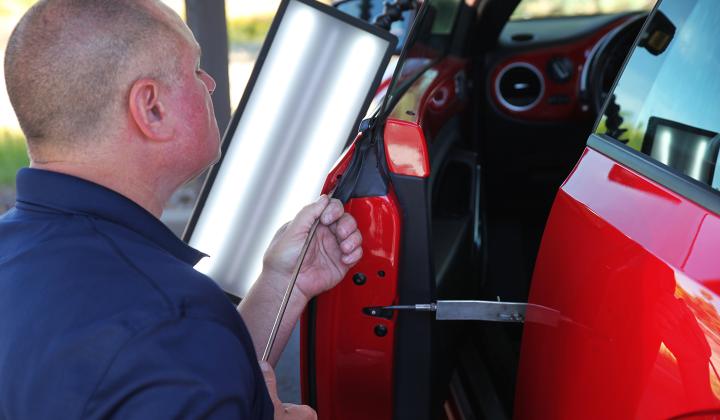
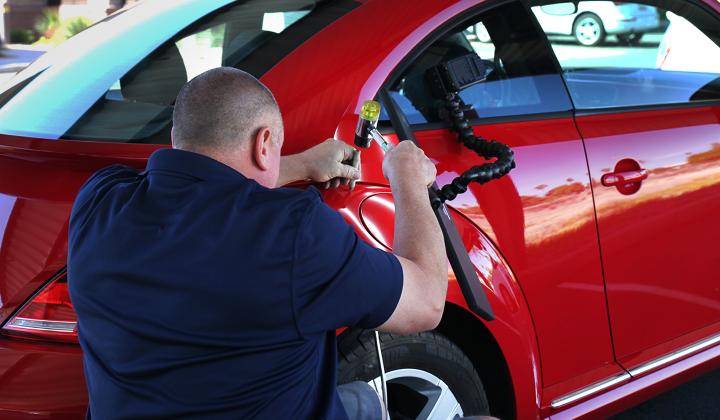
Step 2: Pushing Out The Metal
To begin working the underside of the sheet metal, the Tech uses long metal rods named PDR tools. These tools are used to reach into tiny gaps between panels and into other holes, and they prevent the need to remove panels and lining. However, for dents in difficult locations some disassembly may still be required. Using the PDR tools the Tech will slowly push the dent upwards repeatedly, stretching the metal back into its original position. Depending on the severity and location of the dent, this may take many pushing repetitions to flatten the dent.
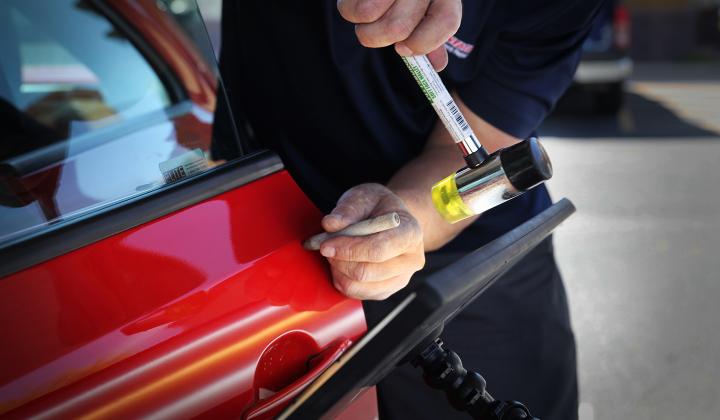
Step 3: Evenly Spreading The Surface
As a result of the dents formation and the PDR process, the metal’s thickness is not consistent in the working area. By pushing the dent the metal will “mushroom” around the affected area, creating a faint ring. To correct this, the Tech will use a plastic “tap down tool” and rubber mallet to lightly tap the ring to be flush with the rest of the body.
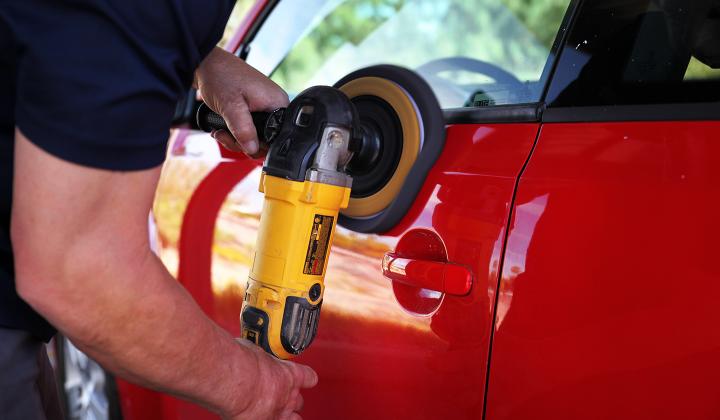
Step 4: Polishing The Repair
The repaired dent may have inconsistencies in the clear coat from the PDR process, as well as from when the dent occurred. In order to return the paint to its factory luster, the PDR Tech will use wet-sanding combined with a high-speed polisher. Using this tactic until the clear coat is perfectly smooth is the "finishing" touch of a great PDR repair.
Step 5: Repeating If Necessary
The PDR process is requires patience and a trained eye to see the tiny changes made during each use of a tool. During the repair process it is often required to cycle through each of the previous steps until the dent has been completely removed.
Thank you Tony!
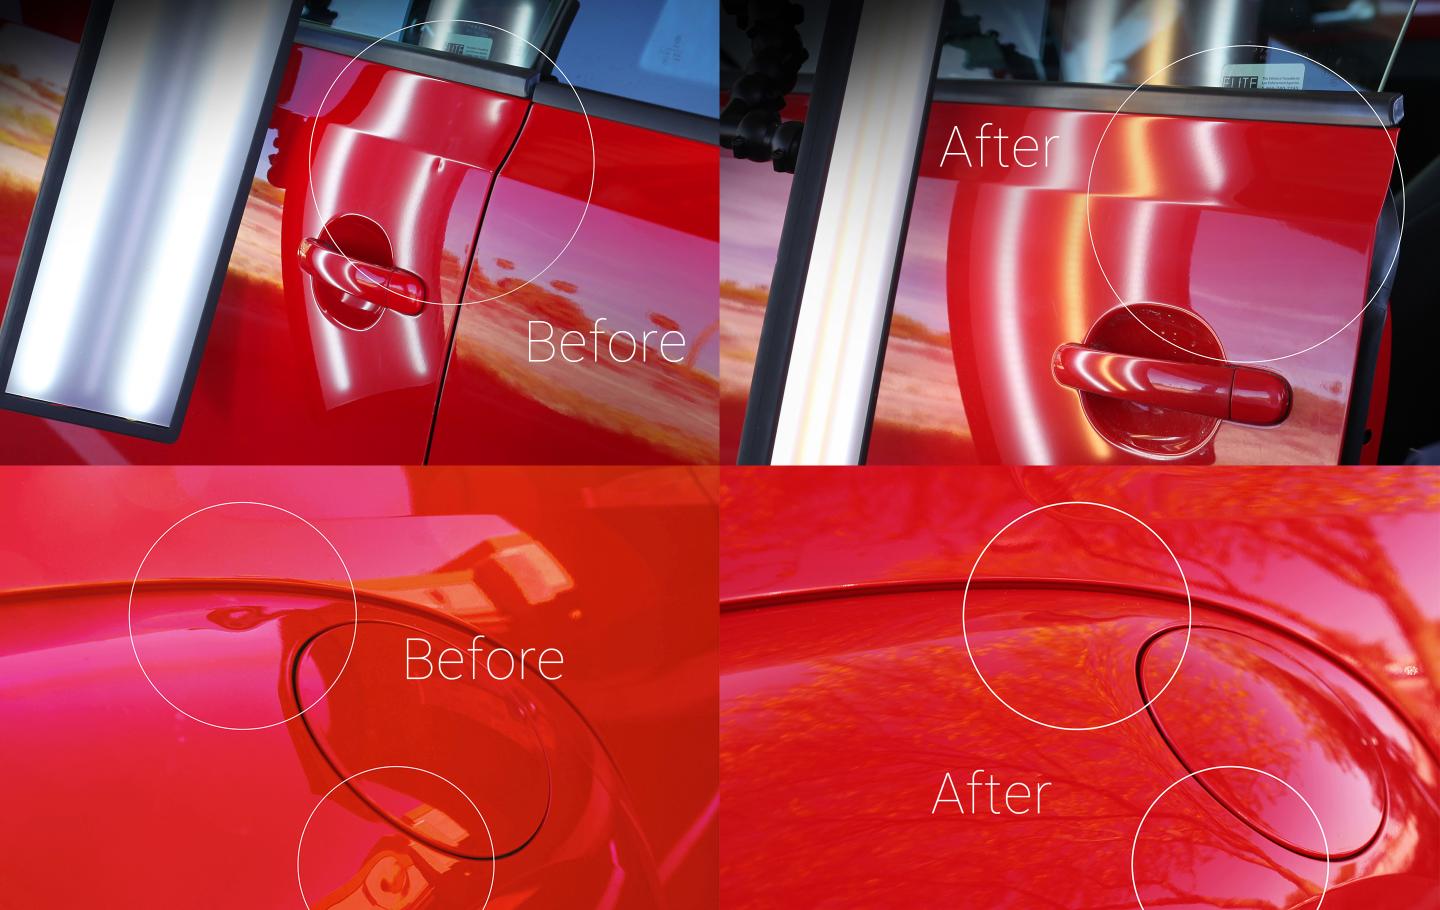
Tony with Advantage Paintless Dent Repair has been fixing up car bodies for over 20 years, and did a flawless job on the NOCO VW Beetle. As you can see if the picture, the dents were completely removed and it took less than 30 minutes for these two particular dents. In conclusion, PDR is one of the best ways to restore the aesthetic look of your vehicle without breaking your wallet. Not only is it a fast and cheap way to restore your car to factory finish, it is also truly an art form that many people have dedicated their lives to. Thank you for reading, and a BIG thank you to Tony at PDR!